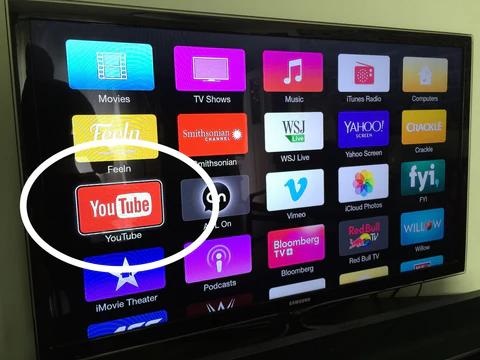
This article is focused on the specific workflow I recommend to watch those awesome memories on your big new amazing flat screen TV, and therefore I will not go into many technical details about formats, compression, transcoding, zzzzzz....
This post if for Mac users only, sorry PC folks.
In my last venture I started and grew one of the world's biggest video special effects software companies called Red Giant. My next mission is to rescue and help people enjoy the billions of memories stuck on tapes sitting in shoeboxes. My first customer was me. We like to say around here, "Those memories won't rescue themselves!"
Let's get those memories to your TV!
I'm going to focus on Mini DV or DV tapes. they look like this but the workflow for the other tapes is similar.
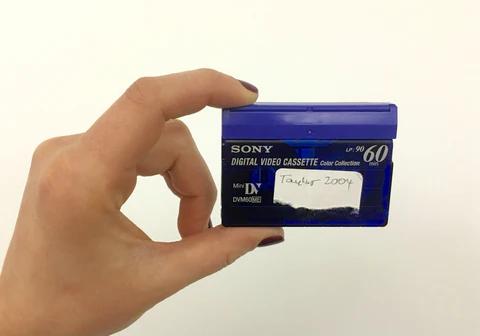
Here is the workflow I recommend and will detail in this post.
- Create a YouTube Channel
- Import the tapes onto your computer
- Choose your favorite videos or clips from a tape
- Trim or shorten each video
- Combine videos into a single video or "movie"
- Upload to YouTube
- Watch the video on your TV through the YouTube app via a Smart TV, Apple TV, Roku, Amazon or Chromecast. (If you don't have one of these, please stop reading and go to Best Buy immediately)
Why YouTube?
I recommend a YouTube Channel for many reasons but the main reason is its ubiquity on all devices including computer, mobile and TV. Other reasons are that it's easy to setup and upload, videos are protected in the cloud (or would survive a computer meltdown), makes it really easy to share videos. Over time you'll assemble a bunch of videos that you'll watch with your family sitting in your living room.
Creating a YouTube Channel
A YouTube "channel" is something you create using your google username. If you don't have a google account, create one here. A Google account also gives you Gmail, online docs/spreadsheets and many other services for free. Next you need to create a YouTube Channel here.
Congratulations! I can't emphasize enough how cool it is to pull up your Channel on your TV after a few years of uploading videos and watch them together with family and friends.
Importing your MiniDV (DV) tapes onto your computer
There are four good ways to get the videos to your computer but I recommend LifeFlix because it's the easiest, cheapest and most fun to use. I also wrote an article explaining other techniques here. Note: I'm a founder of LifeFlix so beware of my bias ;-)
Launch LifeFlix, plugin your camera, click Import, wait 60 minutes and come back to enjoy all your lost memories. Scroll through all the videos in the Scenes window, select your favorites. I recommend trying to make your final video 3 minutes or less, 2 minutes is a good watchable length. No matter how cute your daughter or puppy was, any longer and you may lose your audience.
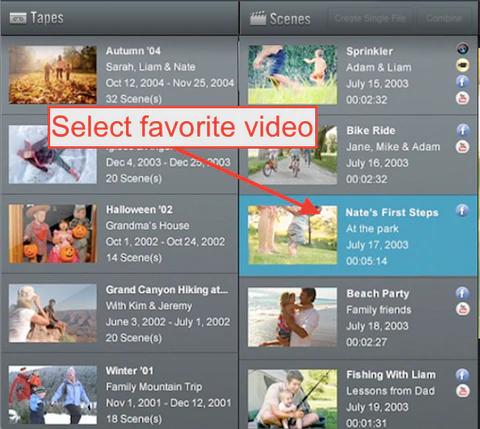
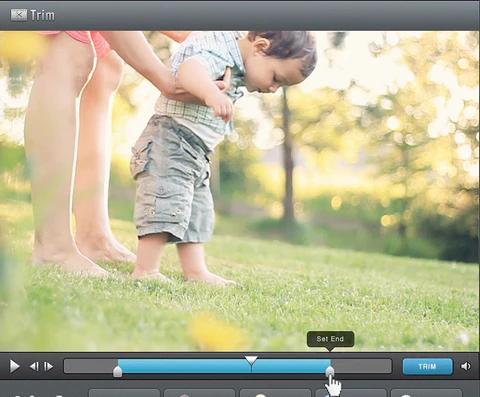
LifeFlix allows you to trim, cut or shorten each video easily. Select the video, then move the Begin and End points (or sliders) to the the points we want to start and end, click Trim. (You can undo the Trim if you want to redo it). We drop a Scissors icon on each video to identify which videos you trimmed. To determine the length of video, LifeFlix shows you beginning and final or trimmed video length below the Scene name.
Almost there! After you've trimmed all the videos you want to include in your final video, go back and select each video or scene by holding down the Apple command key. Then click the blue Combine button at the top. This will combine all the videos into a single video using the first video in the sequence.
Watch LifeFlix tutorial on trimming and combining videos, click here.
Time to send your amazing new video to the cloud, or your new YouTube Channel!
The cool thing about both YouTube and LifeFlix is that after the initial setup uploading more videos is just a single click.

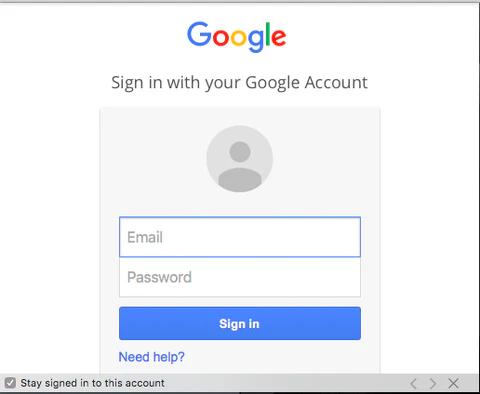
Enter your Google Username here. I recommend keeping the "Stay signed in box" checked. LifeFlix is NOT saving or collecting your information, we just connect to Google's API or service, signing in here is just like signing into your Gmail account. After entering your username you'll be asked to Allow LifeFlix to connect to Google.
LifeFlix gives you an upload progress bar to monitor when the video is uploaded and then we drop a YouTube icon on the video so you know which ones were uploaded.
Now the fun begins.
When the video is uploaded you can log into your account via your phone's YouTube app, youtube.com on your computer or the YouTube app on your TV. On all devices you'll need to login once, then your info will be saved.
Sharing your videos
Sharing a photo via text or email works pretty well, but videos do not. The file size is too large, that is why when you get a video via text message it's a postage stamp size. The best way to share a video is via YouTube, or upload the video and share a link, not the entire video. Videos easily play over cell phone connections.
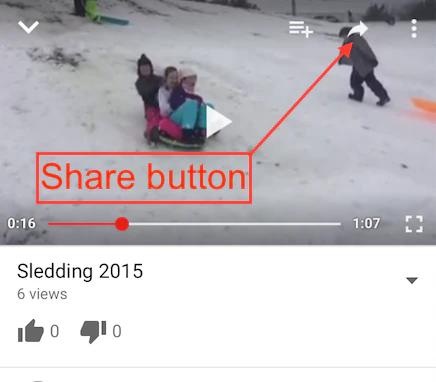
This is how sharing works on an iPhone. Open the YouTube app find "My Videos", select an individual video and look for the Share button (below).
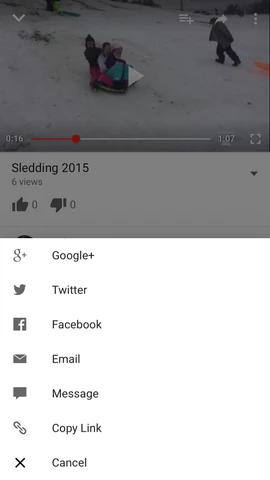
When you click on the Share button, you can then send the video to all your favorite places, including email or Message.
Getting your videos off your old tapes and learning how to create a YouTube Channel is absolutely worthwhile and you'll never regret it. Once a month while watching TV with my family we will pull up one video, and inevitably watch a dozen memories laughing all the way.
Most Popular
Join Our LifeFlix Community
Enter Your Email Address to Sign Up for Exclusive Updates!
Own your
memories
forever
withLifeFlix!
Related Blogs

Digital Media Libraries: How to Choose the Right Storage Tool Part 2
In Part 2 Discover why Library by LifeFlix is the best digital media management tool for macOS. Smart AI tagging, cloud backup, and seamless media org...
Read More ➜

Your Guide to Metadata
Discover the power of metadata in managing photos and videos. Explore types, editing tips, and AI tagging with Library by LifeFlix.
Read More ➜
